Take Control of Your Email Address
published by Eric Mill on
The Internet's not in a great place, and neither are we. We've learned to depend more on fewer companies, and so we've given up much of the control the Internet was designed to give us. We're easy pickings.
So how do we turn this ship around? As a start, I recently switched my public email address from konklone@gmail.com to eric@konklone.com.
Because it uses my name instead of Google's, I have an email address to last me my whole life. It turns out this is actually cheap and easy to do. You don't have to do anything technical or give up any convenience. In fact, I still send and receive all my email through Gmail. But if I ever want to leave Google, it's going to be a hell of a lot easier.
There are lots of ways to pull this off, but the simplest way is to set up email forwarding. Now, emails sent to eric@konklone.com get instantly →'d right on to konklone@gmail.com. Emails I send are addressed as eric@konklone.com. There's no hassle.
I'm going to take you through setting this up for yourself:
- Buying a domain name, and creating a forwarding account. (15 minutes)
- Connecting that domain and that account together. (15 minutes)
- Flipping the switch, and easing the transition. (oh, hey: 15 minutes)
When you're done, you'll have something in short supply on the Internet these days: a measure of control.
So why bother?
"Email forwarding?", you might say, "This is trivial stuff. You're not throwing off the corporate yoke of Google at all! And the NSA can still grab everything!"
Well, you're right. This is only the first step. But even if you only take this one step, putting your own domain out in front of the world profoundly shifts your relationship with the Internet — and the companies who are increasingly running it — in your favor.
To see what I mean, think about your cell phone. When you get fed up with AT&T and decide to switch, you expect to keep your cell phone number. We generally take this for granted, but in the US this is a right guaranteed by government regulations mandating portability.
And you can imagine why: if switching meant a new phone number, changing carriers would be such a tremendous hassle that many people would simply never switch. The US telecom market is terrible enough — cell phone portability is one of the few levers consumers have to avoid lock-in and force carriers to actually compete for their business.
As much goodwill as Gmail has among its users, the marketplace of email providers is not a competitive one. A mere 3 companies — Microsoft, Google, and Yahoo — dominate the market the world over. If you want to switch between them, or move to a smaller company like FastMail or Pobox, you have no guarantees of keeping your provider-assigned email address. In fact, you have the opposite guarantee: portability is literally impossible when your address is sporting a company's domain name.
The answer is to use your own. It's simple, inexpensive, and requires no technical skills. Once it's done, you're trusting a company with your email because they do a good job, not because you're stuck there.
So let's take control.
Buying a Domain Name
If you already own a domain, skip ahead.
If you don't, good news! It takes all of about 5 minutes. We're going to use iwantmyname, a pleasant, pro-consumer company that wants you to own things. Their site is clean and well designed, and doesn't get in your way.
Their domains are also reasonably priced, at $15 for the most common types (.com, .net., and .org). This is more expensive than some, Like GoDaddy. But never use GoDaddy. but as we'll see, iwantmyname also provides other domain name services that will make email forwarding easy.
You can buy anything iwantmyname sells, but when in doubt, just buy a
.com. They're cheap, and everyone recognizes them. You can also get a .org, but that can imply you're a non-profit or public interest organization.
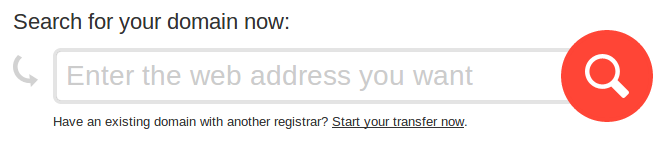
To begin, type in the domain you want into their box of freedom:
You'll see a list of search results. If you're lucky, the domain you want will be happily available:

Click on it to add it to your cart, then click the "Checkout" button on the right. You'll be asked to sign up for an account, enter some basic contact information, and then to, you know, pay them.
And then, you're done! You'll see this:
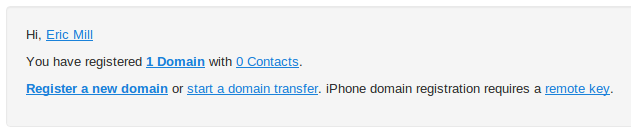
That's it, you've got a domain name. It's your own little chunk of the Internet, and you can use it with whatever and whoever you want. You don't even have to stick with iwantmyname - you have the right to transfer your domain to another registrar any time you want. The Internet is designed so anyone can be in the driver's seat.
Setting up email forwarding
Now that you have a domain, we'll set up an account with an email forwarding service, and then "point" your domain at that service.
There are many services out there that offer email forwarding, but I have been especially impressed with Pobox. They've been around since 1995, and they care about this stuff.:
Your email address, your identity, is how you keep in touch, what you use to access many websites... indeed, it's how you're known. Email forwarding lets you easily change where you read your mail, without getting a new address. Pobox FAQ
Because they care, they offer two very reasonable pricing tiers especially designed for people who only want email forwarding. They'll forward 1,000 messages a day for $20/year ($2/month), and if you're worried that might not be enough, bump it up to 2,000 messages a day for all of $35/year ($3/month). Unless you're on a truly insane number of mailing lists, either of these plans will cover you easy.
in:anywhere after:2013/6/19 before:2013/6/20.
You can also check your Google Account Activity report for email statistics.
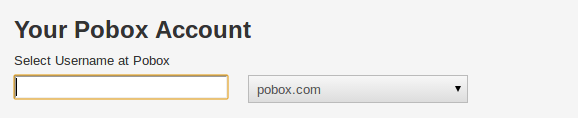
Start by signing up for a new account. When you're asked to choose a username, just leave the domain as pobox.com. You're not actually going to use this email address for either forwarding or receiving email, it's just to get a unique username with Pobox. You'll tell Pobox about your new domain name later.
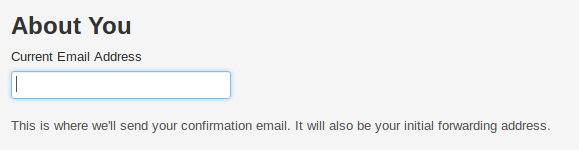
A little further down the form, you'll tell Pobox the email address you'll be forwarding mail to (your current email address, e.g. Gmail or Yahoo):
After you've signed up, Pobox will send you a verification email. Click on the verification link in your email to see this:
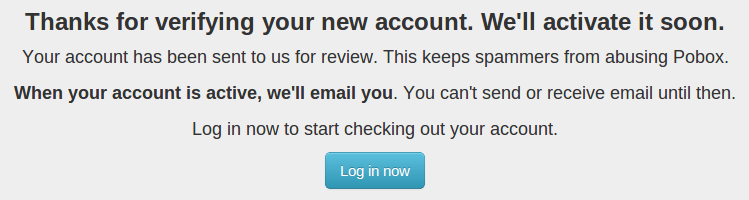
Unfortunately, now you really do just have to wait for Pobox to approve your account. It can take something like a day. When it's done, they'll email you. Until then, bookmark the next section.
Connecting Things Together
Now that you picked up your shiny new domain name and your fancy new Pobox account, we're going to perform some introductions between the two.
We'll start by telling your domain name about your email.
If you're using iwantmyname, they make this as easy as pushing a couple buttons. Seriously: just visit their Email apps, click on Pobox, click "Add Pobox" next to your domain, then click "Install Pobox" on this screen:
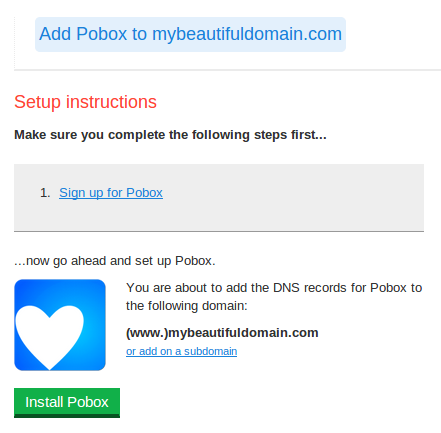
And that's it!
If you're not using iwantmyname, then you'll need to log in to your registrar and find their DNS settings. You're going to add MX records to your domain's DNS. These records -- the MX stands for Mailbo*X* -- tell servers on the Internet how to deliver mail to you.
If you're using:
- Dreamhost, they have a wiki page explaining MX records, which they configure at a special page in their control panel.
- GoDaddy, well for one: Never use GoDaddy! But if you do regrettably use GoDaddy, use this brief guide to setting MX records inside GoDaddy's confusing control panel. Thanks to Ben Chartoff.
- Namecheap, use these instructions for adding MX records in their control panel. Thanks to Michael Weinberg.
- Someone else, you'll just have to poke around, but it's usually not difficult.
Pobox has a nice explainer on MX records, but you don't have to understand how it works. Just obey orders and paste Pobox's MX records into the right fields once you've found them:
mx-1.rightbox.com
mx-2.rightbox.com
mx-3.rightbox.com
If you get asked for a priority, use 10. If you get asked for a name or subdomain, use @.
Next, we'll go the other direction, and tell your email about your domain.
At the end of Part 1, we were waiting for Pobox to approve your account. Now that it's been approved, you're going to tell Pobox about your domain. Log back into Pobox's dashboard, and look to the sidebar:
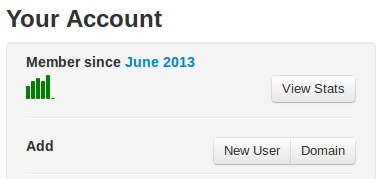
Click "Domain" to go to a tiny form, where you'll enter in the domain name you own.
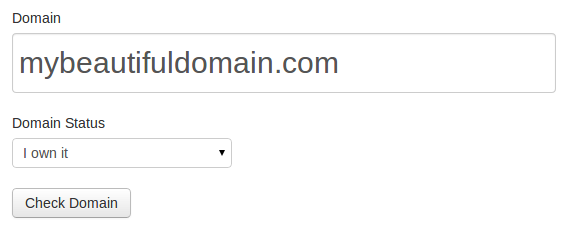
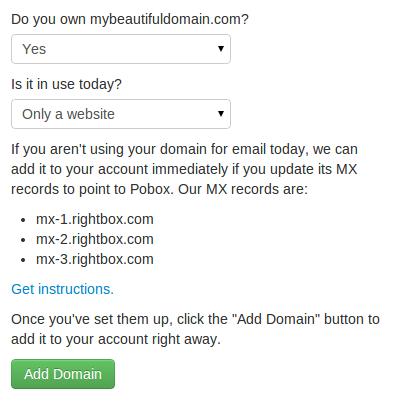
Pobox will check the domain, then ask you whether you own it (say "Yes"), and whether you're already using it for email (say "No" or "Only a website"). Then hit "Add Domain".
If you set your MX records correctly (either by using iwantmyname's "Install Pobox" button, or your other registrar's DNS settings), then your domain should be automatically approved.
Flipping the Switch
Now that Pobox has verified and added your domain, you'll see it appear on your Pobox dashboard:

Click "Add user" to finally pick your shiny new email address:
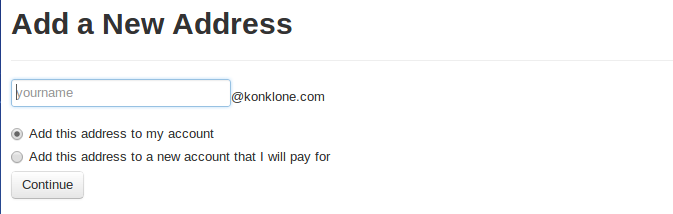
And close the deal by pointing it to your current one:

You are finally done! Go ahead and send yourself a test email — ideally from an unrelated address, like a work account. If it works, then look at you: you own your email address.
Using Your New Address
Your new address will only matter if it actually gets used in place of your old one. You can certainly email blast everyone you know and tell them to use your new address, but there are quieter ways.
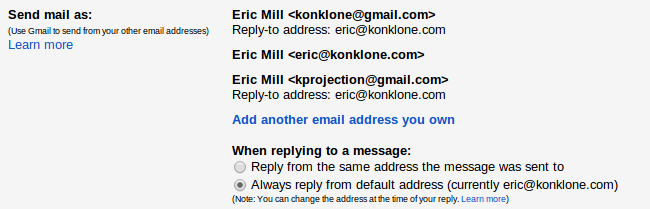
1. Send email "as" your new address. Gmail's Settings screen has an Accounts tab that lets you add any email address you own, and make it your default "From" address. Click "Add another email address you own":
Then enter your new email address in the popup window, and click "Next Step".

Next, Google will ask you which servers should send your email. You can leave it as "Send through Gmail" if you want — but if you do that, many mail clients will show both of your email addresses to people. So, I recommend choosing "Send through [your domain's] SMTP servers" instead, and filling it out like so:
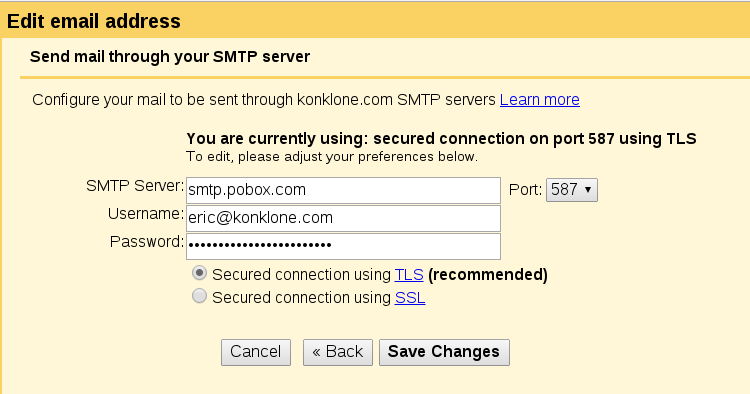
Use smtp.pobox.com for your SMTP server. Use your new email address as your username, followed by your Pobox password. Choose port 587, and a "secured connection using TLS".
Note: If you ever set up two factor authentication for Pobox (and you should), you will need to create an app-specific password and give that to Gmail, instead of your normal Pobox password.
Finally, Google will send you an email with a verification link. After you click it, go back to the Accounts settings and click "make default" next to your new email address. This will send emails "as" your new address, and when people reply to you, they'll automatically send it to that new address. This will work your new address into other people's contacts, and over time people should begin to always email your new address.
(You can do similar things with your Microsoft and Yahoo! emails. Any other decent email provider should offer you the same option.)
2. Add it to your entire Google Account as an "associated email address". Visit your Google Account information settings page to tell the rest of Google's properties about your new email address. This lets you do things like accept Google Group invites at your new email address.

Once you've done this, you can also update your Google Calendar settings to let you accept invitations sent to your new email address. To do this, go to the Settings area, to the Calendar tab, and look for your primary calendar (probably the topmost one). Click "Reminders and Notifications".

At the bottom of the page, you should see a checkbox that lists your alternate email, and allows you to receive invites at that address. Check the box, and hit the Save button below it.

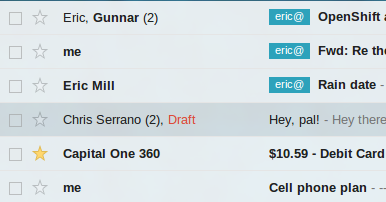
3. See how it's going. To test whether that strategy will actually work, I first set up a filter for to:eric@konklone.com that auto-labels incoming email as eric@ and colors them an attractive blue. This gives me a sense, at a glance, of how well my email address transition is going:
Once the majority of your emails are getting labeled like that, you can reverse the filter so that emails to your old address get labeled instead. That way, you can quickly spot outliers and update your information wherever necessary.
4. Gradually update your online accounts. It may be obvious, but don't stress out about updating all of your online accounts. It's impossible to remember all of them, and impractical to go update them all at once. It's much easier to make it a habit to go change your email address whenever you end up on a site you have an account with. You'll naturally get the most important ones changed quickly.
5. (iOS only) Set it up on your phone. If you use Gmail and an iPhone or iPad, and you use the native Gmail app, it's pretty easy. Michael Alderman writes:
I removed my Gmail account from the app, then added it again. Once re-added, all the settings updated (defaulting the send-from alias, the "michael@" label, etc.). This was the same on both iOS apps (iPhone and iPad).
In other words, Gmail for iOS automatically syncs with the settings you've created on the web. I can verify that the native Gmail app on Android does this too.
If you use the default Mail app on iOS, you can also configure it to use your own domain name. Phil Montero at The Anywhere Office has a video walkthrough of the process, and a larger article that describes it along with some other things.
Thanks to Clayton, who wrote in asking about iPhone support, tried out Phil's video, and has this to share for anyone using it:
My experience: You might receive a few error messages at first (when sending test emails), even as the emails are being sent from your iPhone. For example, your iPhone might tell you that the username or password is incorrect, even as it proceeds to send the emails. Just give it a few minutes -- everything seems to connect after a while and the error messages stop.
If you use iCloud, check out these instructions for updating your iCloud email. Thanks to @pessimism for writing and donating them!
6. Ignore Pobox spam emails when they don't catch anything. Pobox emails you regular reports of spam messages, but annoyingly, they still do this even when they don't catch anything. To suppress these, add a filter for from:pobox subject:"we caught 0 messages for you" and have them archived or deleted.
And Hey
It's pretty cool that you really went through and did all of this stuff! I hope you found it worthwhile, maybe even a little eye-opening. You didn't have to be a company or get licensed or anything, and you made a working email address on 100% your own terms.
As you encounter services and companies on the Internet, consider whether they will make you more or less powerful. It's not always an easy question. Companies like iwantmyname and Pobox are designed to give you more power: they free you from long term dependency, and they're easy to leave. Not coincidentally, they cost money. But their real market challenge is subtler and dangerous: they require you to learn a couple of concepts about the Internet.
The goal of many other successful Internet companies is to convince you not to bother with all that learning, so that they can be a part of your identity and extract as much value from your daily life as possible. Free services like Twitter and Google offer lots of benefits, and certain kinds of power. But I think we've all felt that uncomfortable gut sensation we get when we see a bad news headline, or a canned product, or really anything that reminds us how much we depend on these free, smiling behemoths and how little control we have over them.
Getting a domain name and sticking it in your email is just a small step towards online independence. There's a lot more you can do. But it is a real step, and you've taken it.